If you’re a creative, a business owner, a freelancer, I hope this resonates with you…
RAW Vs Edited Photo

If you didn’t already know, almost all professional photographers shoot in a format known as RAW instead of JPEG. The reason for this is that shooting in RAW format allows the photographer to capture whatever it is they’re trying to photograph in its untouched state. It allows the camera they are using to capture and retain as much original information as possible. If you shoot in JPEG, you’re letting the camera interpret, as best as it can, what the colours are, how much light or shadow is present, and a whole list of other things. One way to think of it is – you’d rather have as much information as possible and remove anything you don’t want or need, than not having enough information and trying to guess what the missing information is.
If you’re a professional photographer, you probably already know this information so this blog post isn’t really for you. But you may learn something 🙂
The one inherent thing to shooting in RAW format is that the images come out very flat and dull looking. The colours don’t seem to be as vibrant as in real life. The one thing to note, however, is that all the information is there in the photograph, you just need to bring it out. It doesn’t matter what kind of expensive camera you have, this holds true for any camera that shoots in RAW format. Even consumer grade cameras that are $400 shoot in RAW.
That was just a very basic understanding of RAW vs. JPEG. As a photographer, I would then import those images into my editing program and apply my creativity and style to each image. This is really what this blog post is about: to give you an understanding that the images professional photographers capture are originally flat looking and dull and it’s up to each individual on how they want to present the photograph. This is where their artistry comes in and what differentiates photographers.
A photograph can be retouched and edited an unlimited number of ways. Typically, what a great photographer would try to do is get a really great base photograph – that’s setting up proper lighting, composition, posing etc. Most would shoot with the intention of how the photo will be retouched or edited so there would be some thought put into what they’re doing before they even shoot it.
We’ll show you, below, some examples of before and after photos of RAW vs. edited through the style that is Vivid Ribbon. As we mentioned, there’s an unlimited number of ways a photographer can shoot a photo and edit it and it’s really all part of their style and artistry.
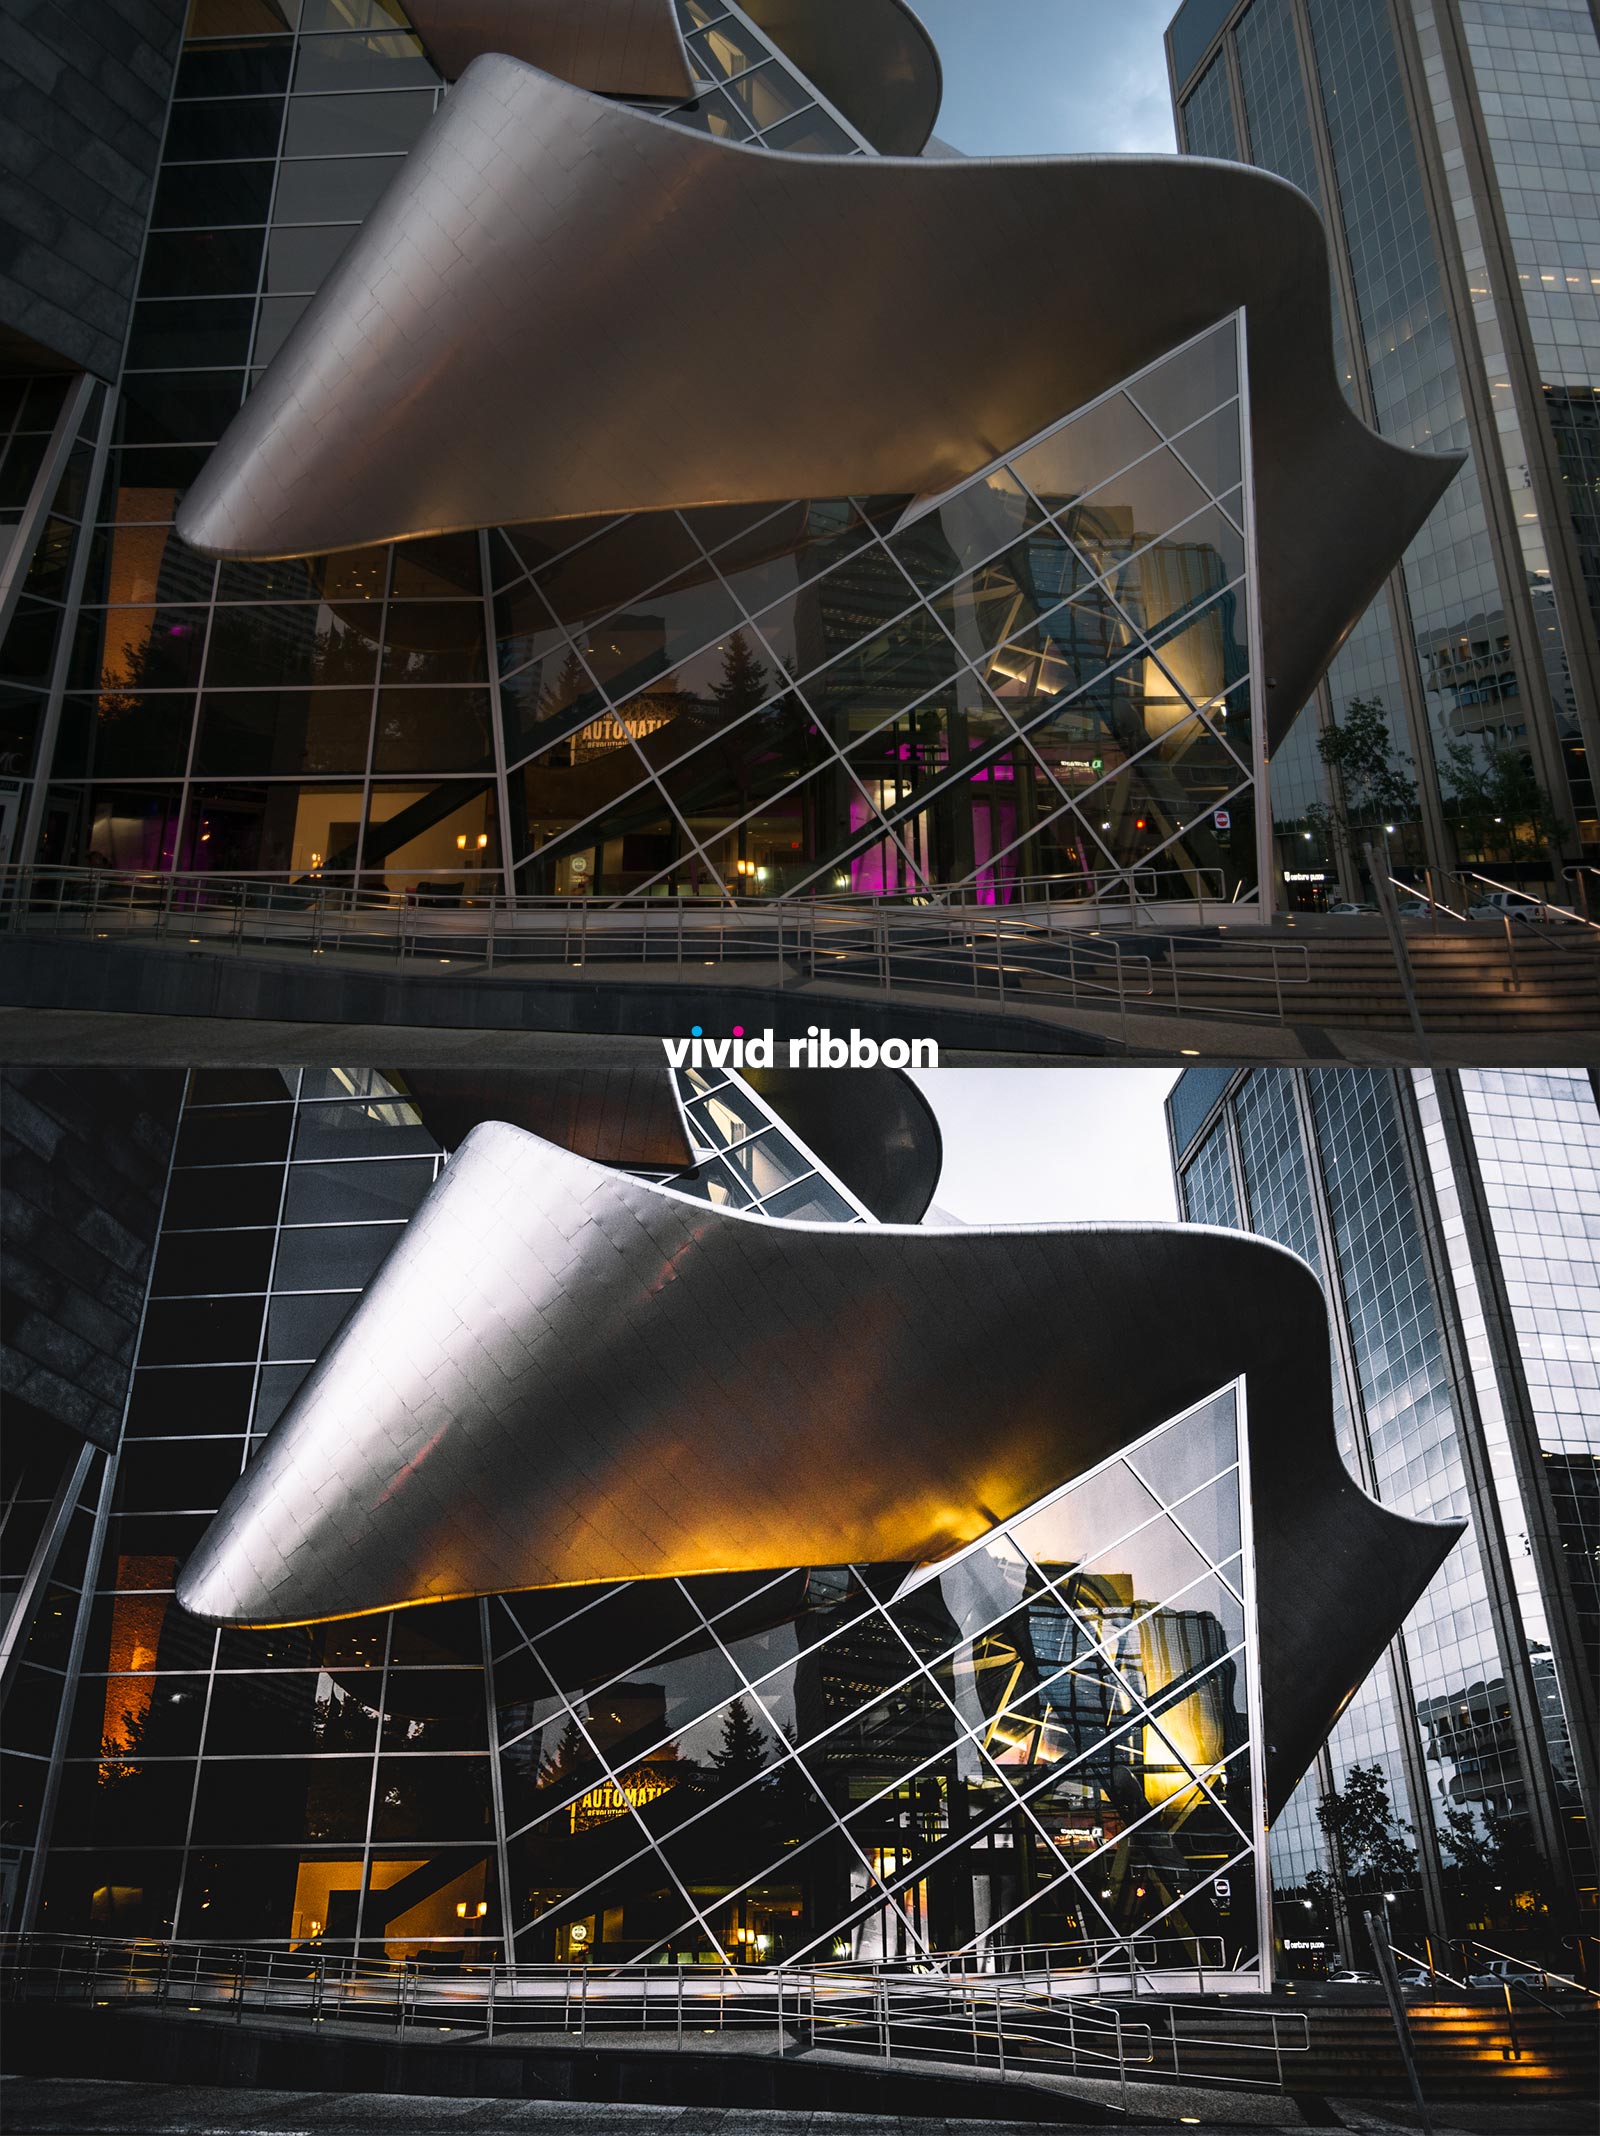
Example 1: Art Gallery of Alberta
- This building has a metal and glass exterior. In the edited version I wanted to bring this feature out by increasing the clarity and highlights on the metal and glass and increased the contrast overall.
- Shadows increased overall.
- By doing this, it brings out the important details in the photo and creates the desired mood of the photo.
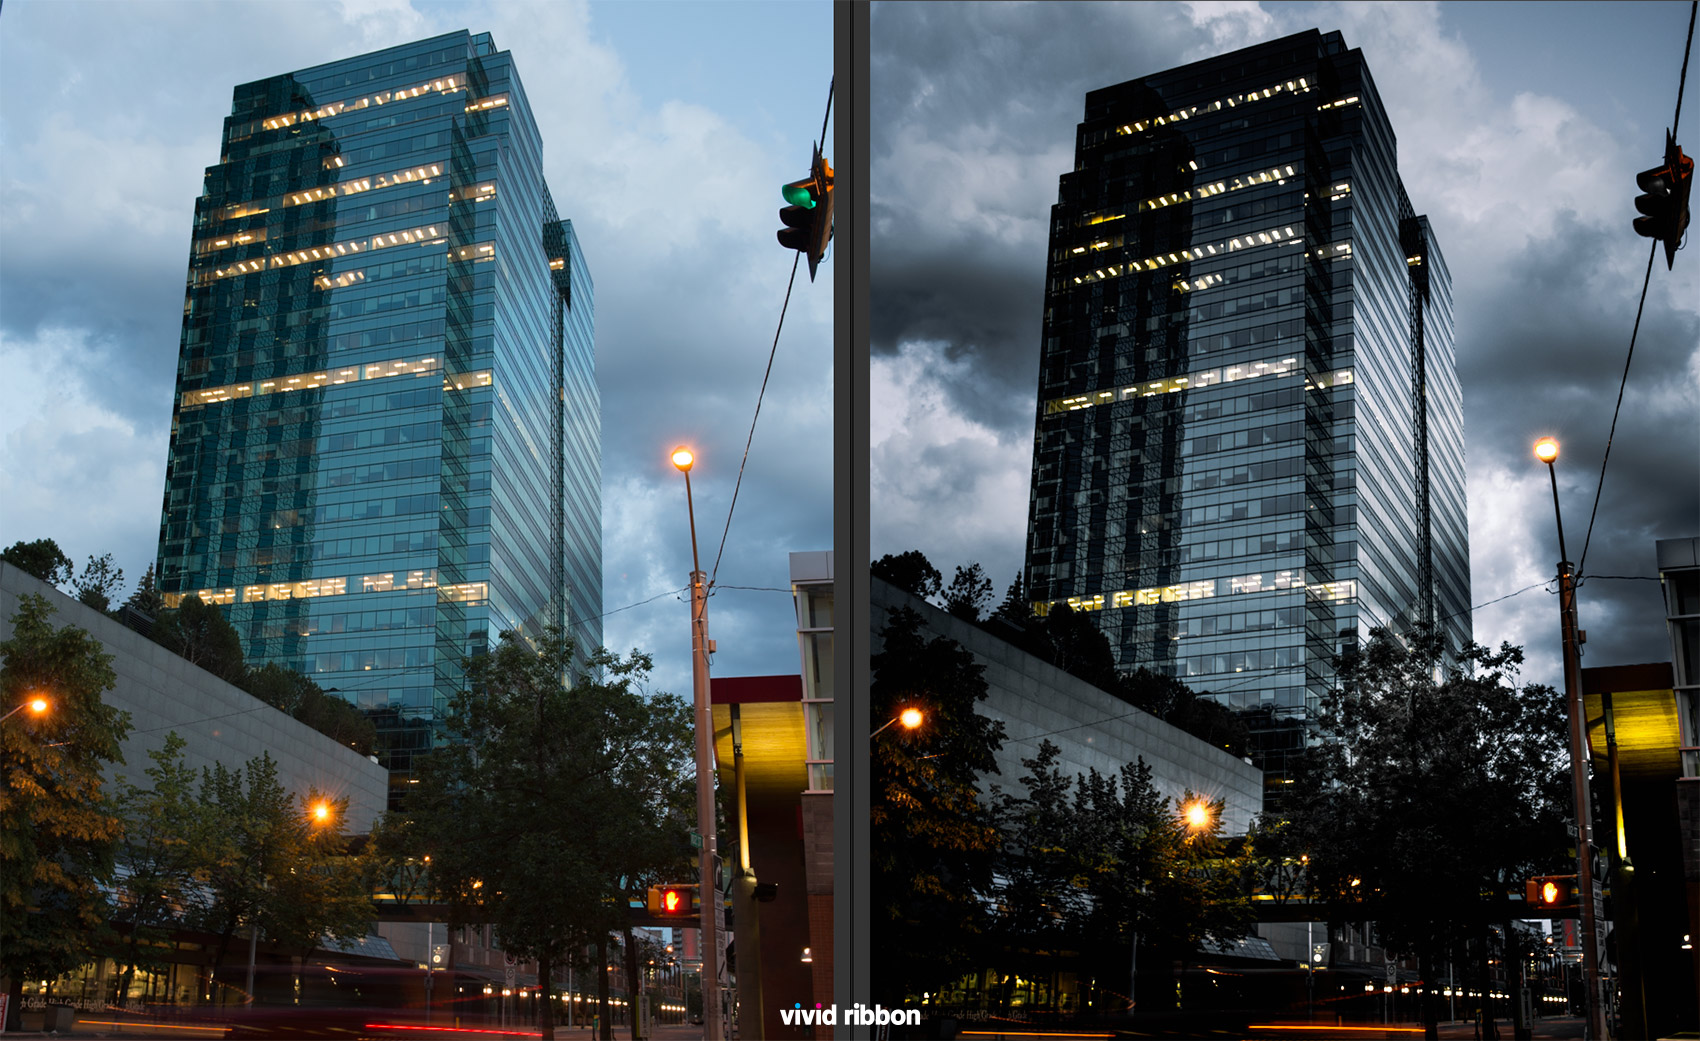
Example 2: Doing away with unimportant details
- In this photo, the trees in the foreground are not really of any significance so I increased shadows in that area to allow the focal point to be on the building.
- Increasing the detail and clarity of the glass on the building was important. You can now see all the panes of glass in the ‘after’ photo in greater detail.
- Bringing out the detail in the clouds and giving the ‘after’ photo an overall dark tone achieves the desired mood of the photo.
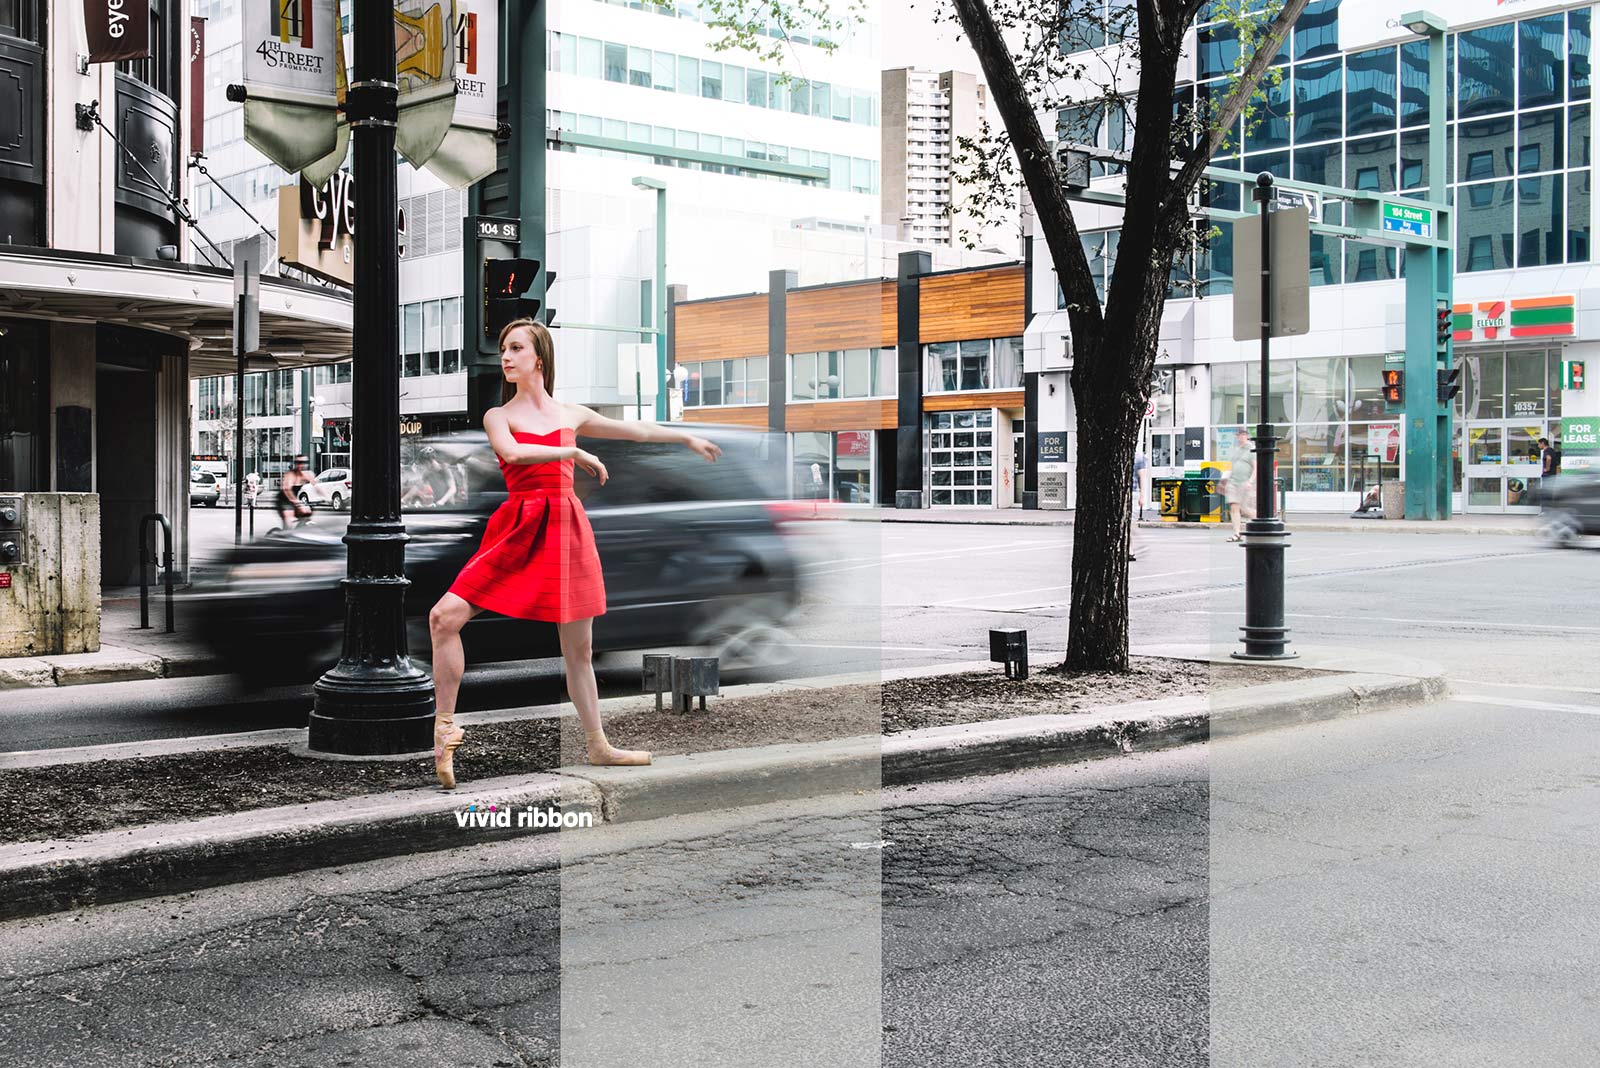
Example 3
- I have spliced together the before and after into one photo below.
- Starting from the left is the ‘after’ photo followed by the ‘before’ and then repeats.
- You can see that in the ‘before’ strip that there is definitely less detail and it looks flatter and duller than the edited portions.
- There is more contrast and detail overall. Look at how the red dress has more of a saturated colour in the edited version vs. the original ‘before’ portion, the pavement shows more of the wear in the road, the wood panels in the background show more detail.
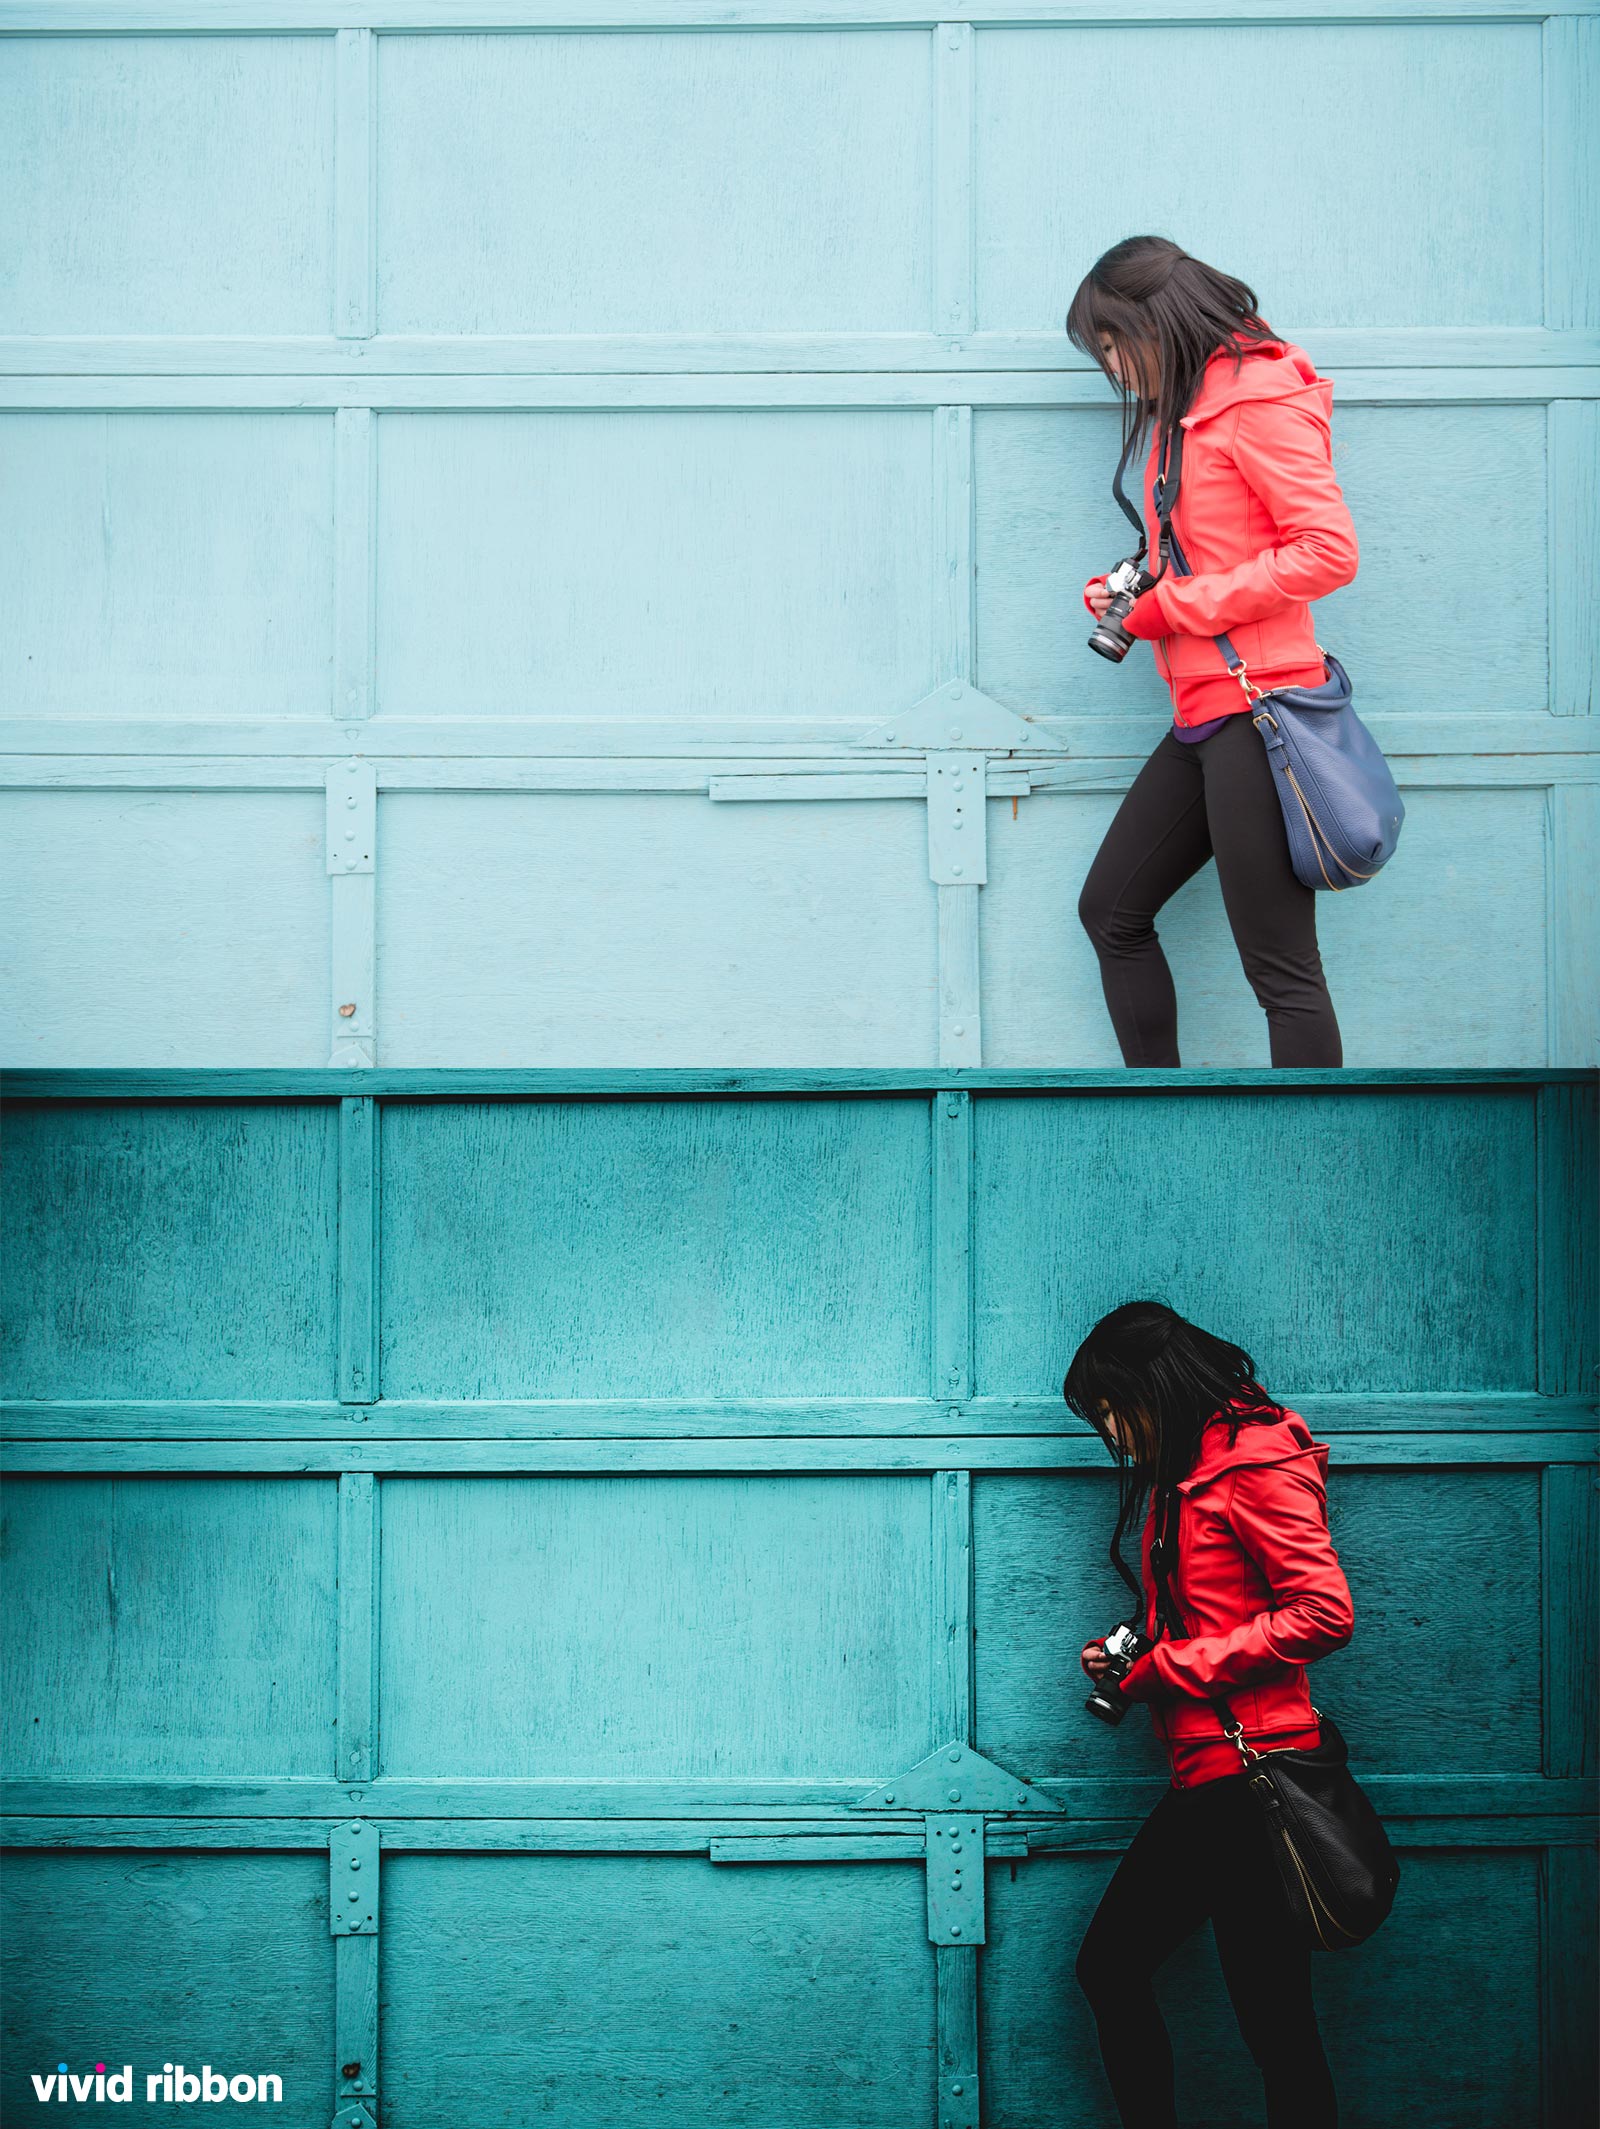
Example 4
- Which version would you rather have printed and framed up on a wall?
- The original RAW version, again, is dull and the colours are not as vibrant.
- The focus of photo is the contrast between the girl’s jacket and the teal garage door so I increased the vibrancy of the teal and decreased the luminosity of the red in her jacket to allow for more detail.
- An increase in contrast and clarity was added, shadows were increased, and a small vignette was added to give the photo the overall desired mood.
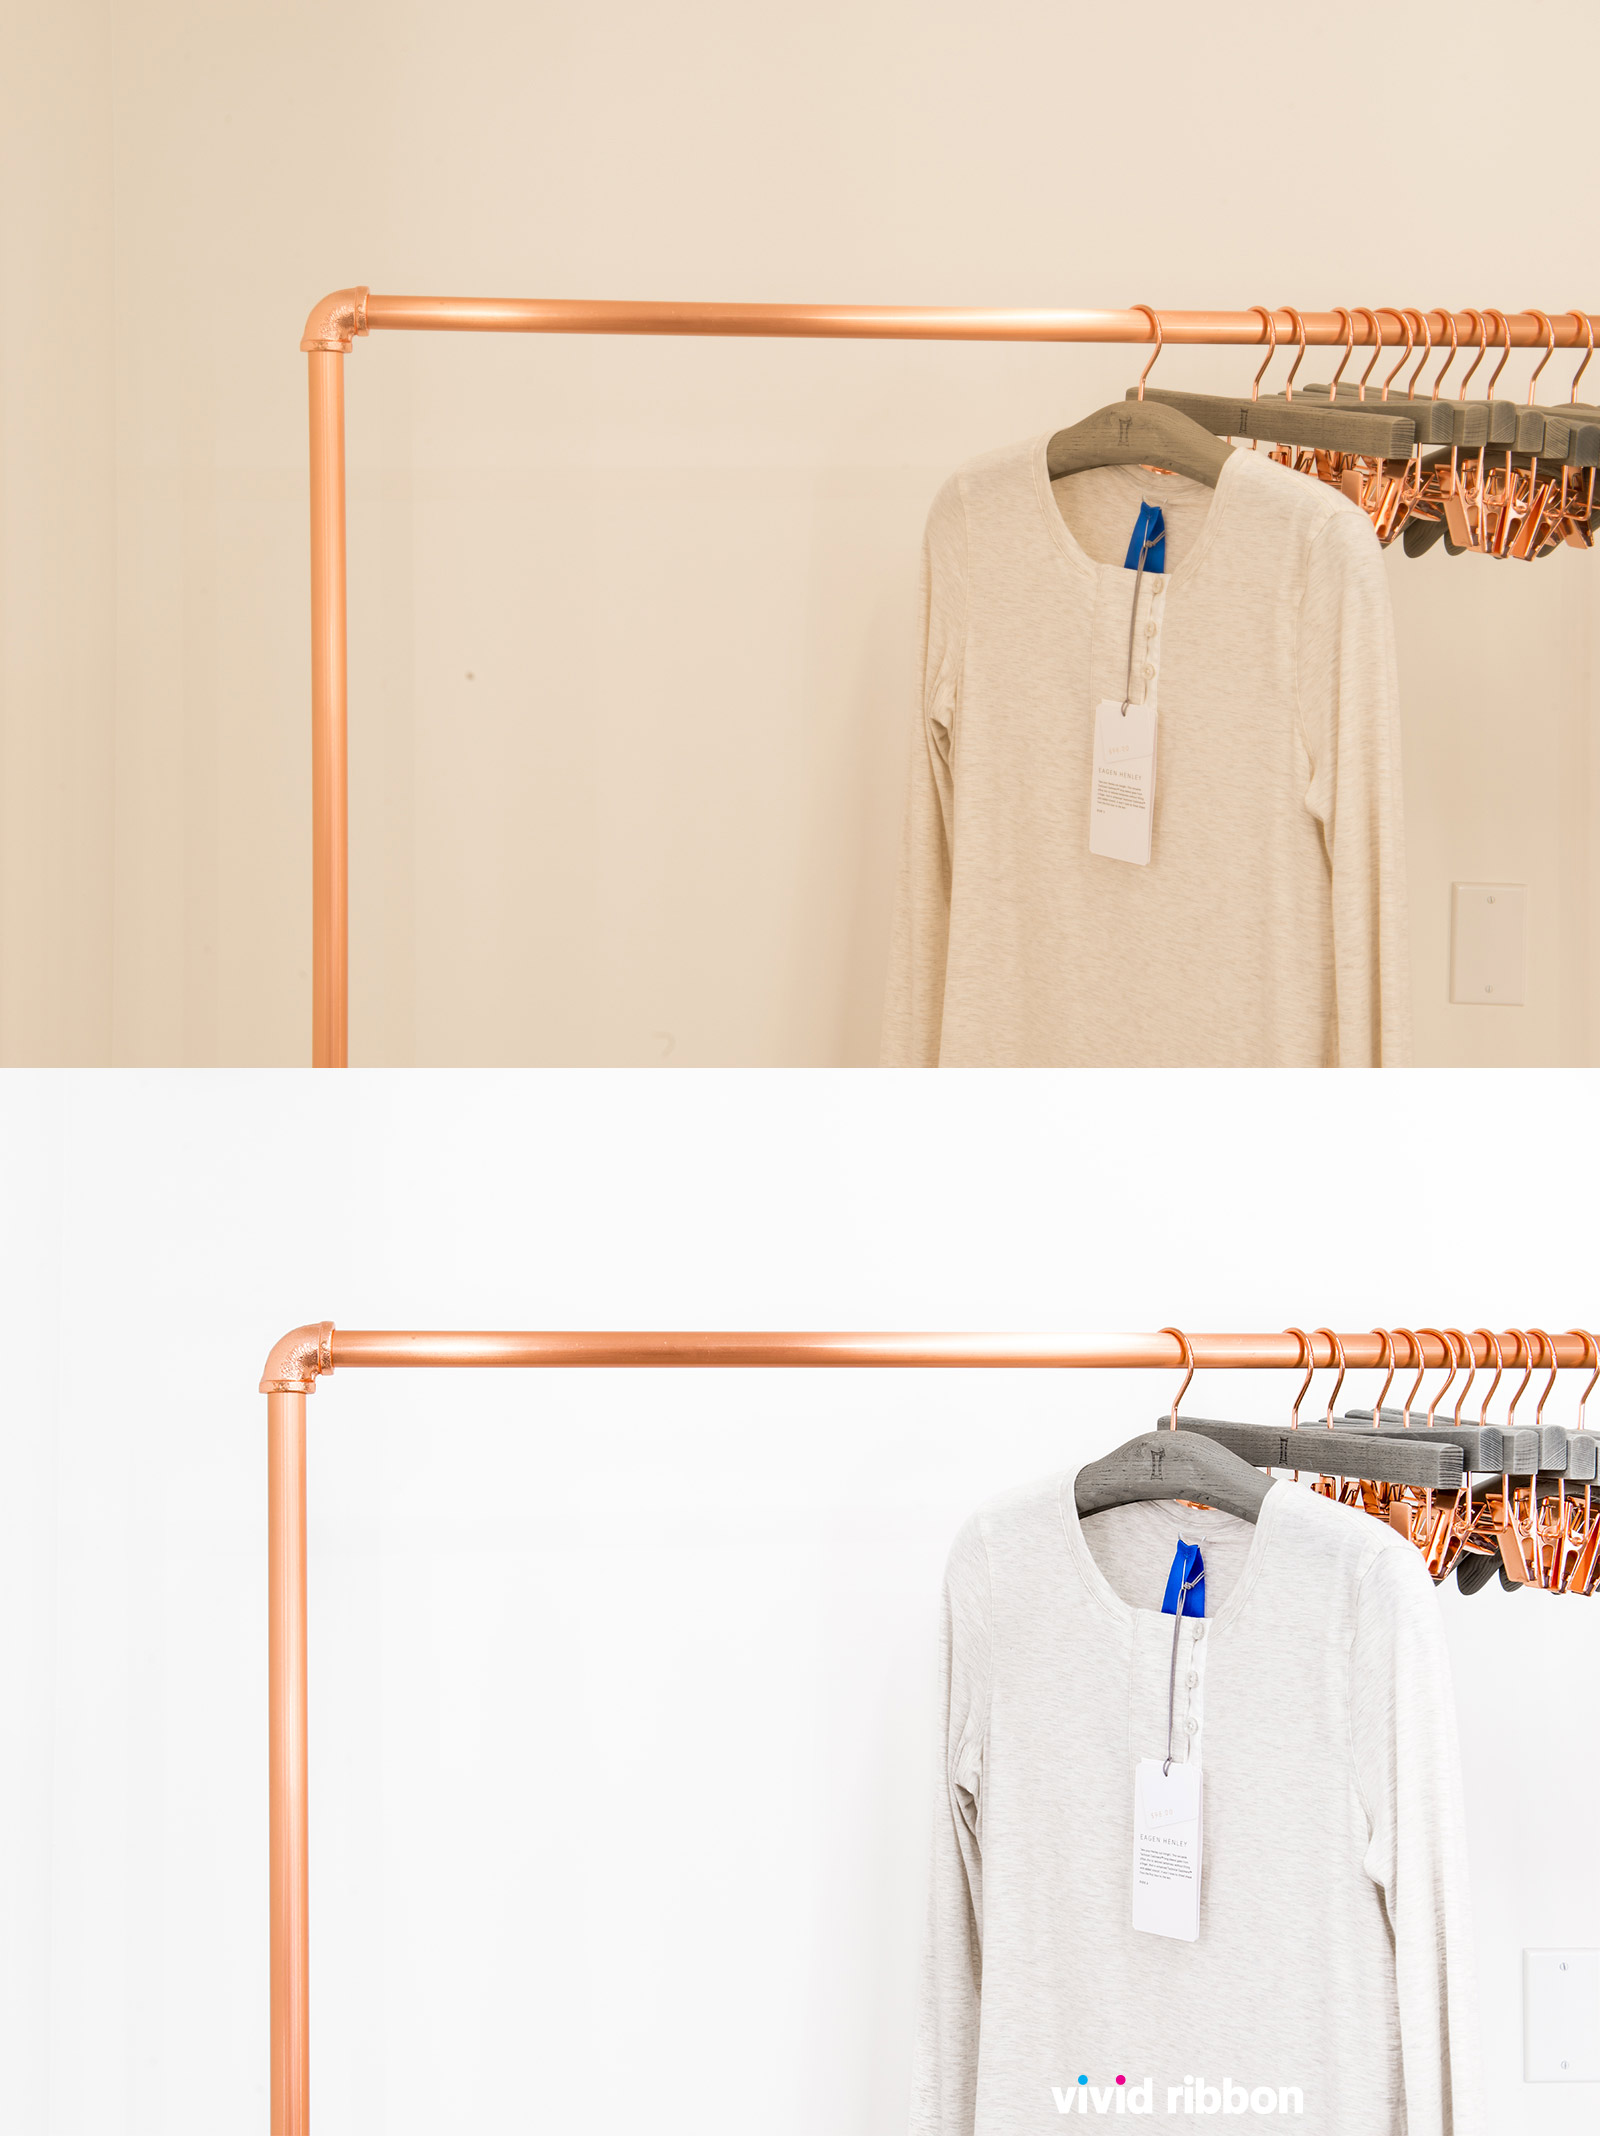
Example 5: Interior and product shots
- This is a great example of presentation versus reality. In reality, when you walk into a store, it is more comfortable on your eyes if there is warmer light instead of bright and white lighting. It would definitely help you stay in a store longer and shop longer. That’s what all stores want.
- However, when you look at something in print or a product shot, you want to see as much detail as possible and removing the yellowish cast that incandescent lighting produces can help you see those details.
- In the ‘after’ photo, I have corrected the white balance, which then allows you to see the copper in greater detail and you can see the shirt in greater detail as well.
- I have also removed the little dot that’s near the middle of the photo.
- The copper display rack has been corrected to be fully horizontal. You can see in the original that it is slanted.
We have spent years getting to the level we are at now and it takes learning, trial and error, and awareness of what the trends are in the market to know what approach to take and when you should apply those concepts. Having expensive equipment certainly helps make your job easier but really, it’s about knowing how to use the equipment and getting the desired results that is important. Anyone who has money can buy equipment, but that doesn’t mean they have the skill to operate it. In addition to being able to take a great base photograph, what differentiates photographers is their artistry, creativity, and their ability to produce what it is that you, the client, is looking for.
Anyone can have access to an editing program, but will the end result be in alignment with what you hired that person to do? Not all photographers are equal. Not all professional photographers are equal. Select the photographer that you trust that can produce the result you’re after. In addition, consider the level of professionalism they will bring to the project and their level of customer service. All of those things matter when it comes to selecting a photographer for your project. Let’s make it easier for you: choose Vivid Ribbon 😉
About Vivid Ribbon Photography & Design: We specialize in Commercial, Interior, Event, Fitness, and Portrait Photography, in Edmonton, Alberta, with a focus on helping businesses promote their product or service through creative and captivating photography. We produce photos and creative artwork that are in alignment with our client’s marketing and branding objectives.
Related Posts
Comments (0)